In this extended tutorial, I’ll be showing you how to earn passive income through Turbosquid (or any content syndication platform). Uploading your content for sale has many benefits. The most obvious is that it can earn you extra money on the side. While it won’t be very much early on, if you upload a lot of quality content you’ll start earning a respectable monthly sum. Besides that, you also get your name into the industry and it’s another good reason to practice and hone your skills.
For those who aren’t familiar with Turbosquid, it’s a platform where studios and artists go to take shortcuts in their work. Suppose that it takes 4 hours to make a good vending machine prop for a level in a video game. If your designer costs $25/hour, then it starts making more sense to buy the object online at $39.99 and get it instantly than to build it from scratch for $100 and four hours.
However, Turbosquid has its share of problems:
- People often get the wrong idea about how much work it takes to make money through selling content,
- building content isn’t easy, and
- too many artists don’t prepare good product pages once they’ve painstakingly created a product.
This tutorial will guide you through these three major sticking points. I’ll start off by guiding you into the right mindset for uploading content. Then I’ll give you a walk-through of how I built a cellular phone for my portfolio. Finally, I’ll show you how I created the Turbosquid product page for it; including some tips on how you can maximize your revenue by making your product most visible to the right people.
Setting Expectations
The first thing you need to check before you even think of uploading something is about whether it’s actually saleable. There are a lot of reasons why you shouldn’t make your content available for sale:
- You don’t own the intellectual property,
- No one would buy a product for that level of quality, or
- The work product was too specific
Allow me to elaborate before I’ve completely crushed your ambition. First, make double sure that you have the rights to make money with the content you created (or are about to create). If the work was done for a client, get written consent. If it’s identical to a real-life product or prototype, make sure you’ve incorporated sufficient originality. While I’m not telling you to do anything illegal, it’s always a good idea to see what everyone else is doing. For example, Apple will not track you down for building and selling a 3d model of the iPhone (partly evidenced by the sheer number of them already uploaded for sale). On the other hand, you’d be in a world of hurt of you build and sell a textured/rigged model of Wall-E from the Pixar movie. In part, you can tell because no one else has this posted for sale, but also because Wall-e was originally a 3d model and if Pixar wanted it sold, they would have posted it for sale. Next, do a reality check and make sure you’ve made something that’s useful to someone. An intricately detailed model of an off-brand laptop from 1992 is not going to sell as well as a low-poly American Humvee. Similarly, you shouldn’t be wasting your time uploading a sphere on a cylinder and calling it a tree. That’s as close to a sin as you can get.
The Worst Part of All
Now that we’ve gotten the basics out of the way, allow me to make something as clear as possible. You will not get rich immediately using Turbosquid. Say it out loud if necessary. It’s a fact, and if you do get rich, then send me an e-mail because you belong with the other Gods of our field (like Vitaly Bulgarov, Grant Warwick, and Ben Mathis to name a few).
The Money is There for the Taking
Now that I’ve successfully crushed your spirit remember that just because you can’t buy a diamond-encrusted swimming pool, doesn’t mean you won’t make anything at all. There are many artists who make a respectable living building and uploading content to Turbosquid. I haven’t become a millionaire yet, but I have made enough money on Turbosquid to buy a Nintendo DS, a few airplane tickets to visit the family, and a several cases of beer. This extra cash has the wonderful tendency to sneak up on you- suddenly there’s extra cash in your account that wasn’t there before. And when you bring a case of beer that you bought with surprise money, you’re the toast of the party and you feel twice as good about it.
The Plan
Let’s get started. On the surface, the roadmap is very simple:
- Build Content
- Upload Content
- …
- Profit
Unfortunately, the execution of these steps can be difficult. The best way to approach Turbosquid is with content already prepared, or with another purpose in mind. In all honesty, I’m doing this cellular phone project primarily for my portfolio, then for this article, and then finally for Turbosquid revenue. If you approach a project with the sole intention of posting it to Turbosquid, you won’t make enough money to justify the work and you’ll feel frustrated and disappointed. It’s just like a relationship- it’s hard to make love work when you walk in expecting love. Meet someone wanting friendship, and let it go from there.
Thus, if you already have content ready for posting, you can jump ahead to the later steps. For those of you walking in without any existing work, let’s take this one piece at a time.
Take a look at the list below, where I’ve broken out the entire process into 5 steps:
5 Steps to Turbosquid Revenue
- Decide what to build
- Build that content
- Package the content
- Build a Turbosquid product
- Lather, rinse, repeat
I’ll be addressing each of these steps to show you (as literally as possible) how to earn passive income through Turbosquid.
Decide What to Build
Before we get too far into this section remember that if you’ve already created the content, there’s virtually no harm in just uploading it. Unless it’s really ghastly work, you’ll always make a dollar or two if you price it right. If this is the case, skip ahead.
If you’re just starting out, try browsing around Turbosquid for obscure objects like specific props, animals, or plants. Virtually every category of content has been heavily fleshed out, and it’s easy to feel like you’ll be buried in it all. But don’t worry- good content rises to the top, so if you’ve produced a quality product at a reasonable price, it will get noticed. Remember, too, that you’re looking for both a product and a price range. We’ll be building a cellular phone in the next section, and there are hundreds of them on Turbosquid. However, at this price range and quality level, there are only about a dozen of them- which will give me a good shot at making a few dollars.
Bonus Points
I heard from a reliable source that if you really want to impress a buyer (i.e. for repeat business), start off right by setting the units and sizing of your scene to something realistic. Use imperial units (feet or inches) or metric units (centimeters or meters)- never generic units. Also, make sure your numbers are realistic- nothing gets buyers aggravated more than having to rescale assets from 1.2 million generic units to a more reasonable 30 meters. Getting this really wrong can mean returns, and getting this perfectly right builds your reputation as a talented, detail-oriented seller!
Another good place to start is Onno Van-Braam’s website, the-blueprints.com. Pick a blueprint of something you like (a tank, a PSP, or human ribcage) and build it according to the blueprints. The best part of this is that it’s free! You get excellent practice working like this, too.
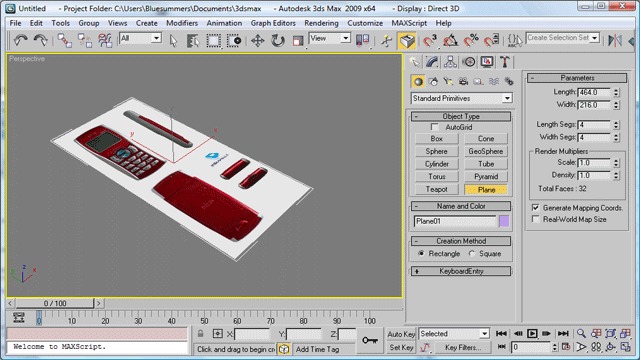
I’m starting off with some photographic blueprints from Onno’s site. You can download it here, though you might want to pick a different blueprint and try to personalize the project a little bit. Just right-click the image, and save it to a folder. We’ll bring it into 3dsMax and use it as our guide. You should already be familiar with setting up blueprints in 3dsMax, so I won’t go into that. I prefer to make instances of my object and use a static viewport rather than create several blueprint planes and manipulate a single object.
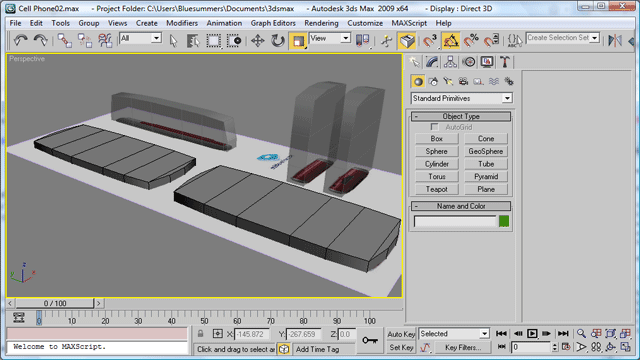
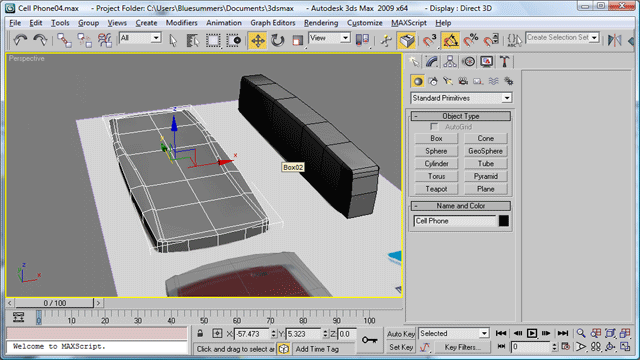
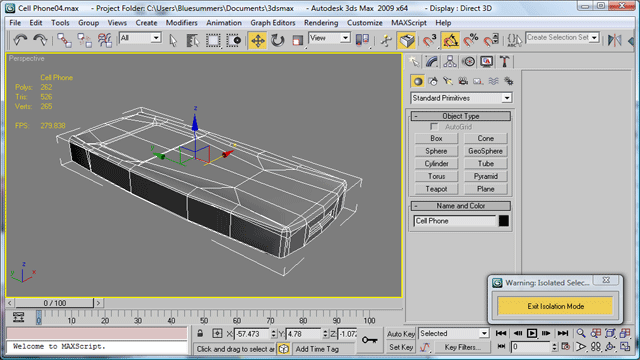
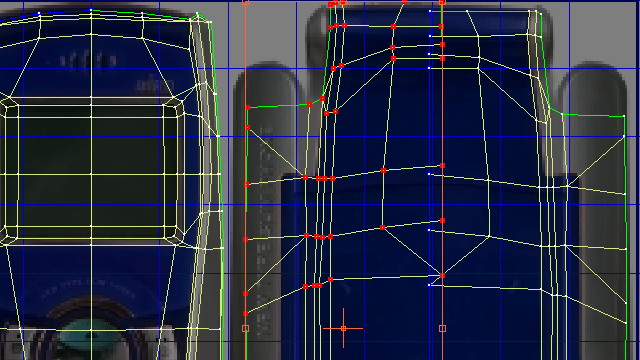
The image below shows some of my initial steps in creating the cell phone. I’ve started by adding some tessellation and getting the profile of the phone started.
The phone has these silver ridges along the sides. They’re going to be hard to get textured, but that’s not a problem right now. I’ve added some edges to help follow those contours.
In the image below, I’m using 3dsMax’s chamfer tool to get some extra edges to create depth in the phone. I’ve also added some edges along the corners to start smoothing things out. I’m anticipating adding geometry for the screen and the plug, but not for the phone’s buttons. We’ll have to do that with a heavy bump map.
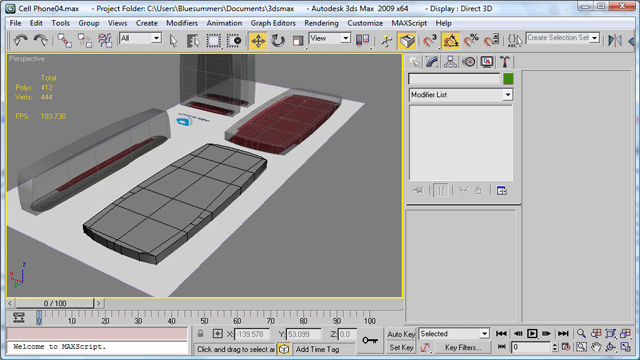
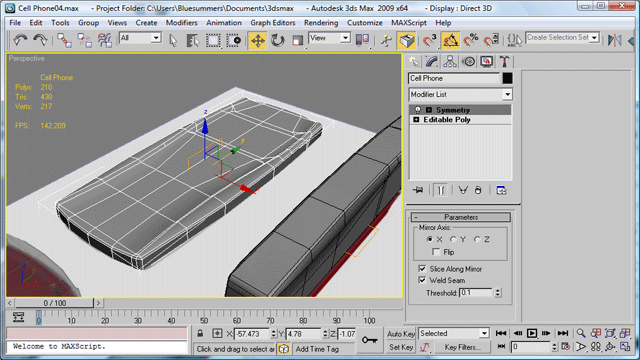
The next step is to keep adding geometry and moving things around. The image below shows my progress at 430 triangles, in part because I’ve started using the symmetry modifier. You can also see the new geometry around the screen that will eventually be extruded inward.
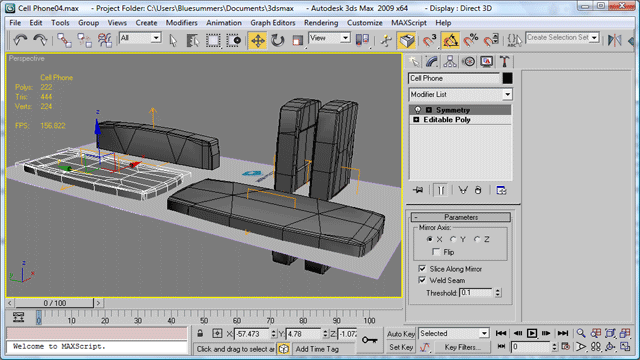
In the image below you can see that we’re very close to the final geometry for the front and back. Notice that I’m completing all of my edge loops to prevent 5-sided polygons (finishing them into polar coordinates, but we do what we have to). I’m sticking to box modeling as much as possible to prevent holes.
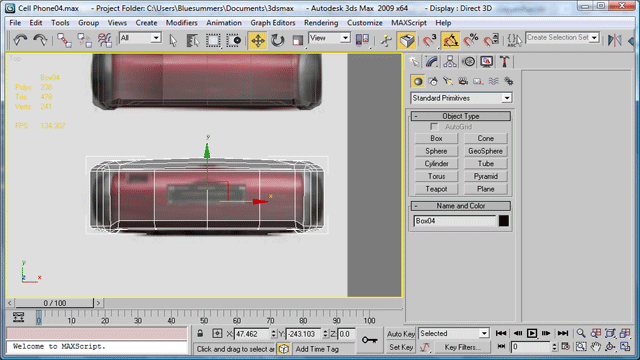
All that’s left in terms of modeling is the top and bottom. The top was easy because the geometry of the phone just curves in a smooth transition from back to front. The bottom, however, has a microphone and charging jack. The mic will have to be bump-mapped, but the charging plug is pretty noticeable. I’ll add some geometry there.
It looks like I’m pretty much done with the modeling portion. Aside from a few minor touch-ups during the smoothing groups and UVW phases, there isn’t much more work to be done on this model.
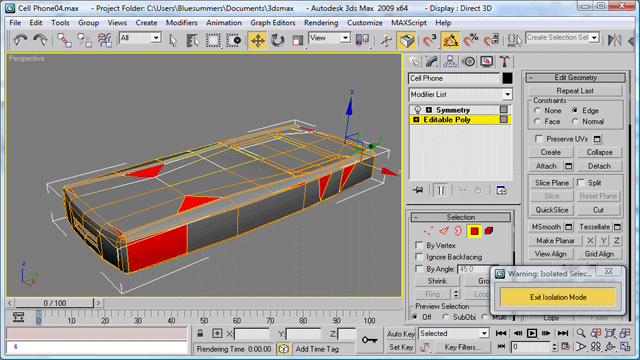
The next step was to begin cleaning up the model in preparation for a Game-Ready Submission. For starters, we need to make sure that there aren’t any holes or n-sided polygons. Checking for holes is easy- just go into your border select mode, and hit Select All. If nothing is selected, there are no holes. Otherwise, you’ll need to double-check your mesh flow.
Checking for ambiguous polygons is a little more difficult. Eye-balling it will work for simple objects but it can get tedious very quickly. Consider using the following script to select non-quad polygons (only works on Editable Poly objects):
face_selection = #{}
base_obj = $.baseobject
num_faces = polyop.getNumFaces base_objfor f = 1 to num_faces do
(
num_face_verts = polyop.getFaceDeg base_obj f
if num_face_verts != 4 do face_selection[f] = true
)polyop.setFaceSelection base_obj face_selection
max modify mode
modPanel.setCurrentObject base_obj
subobjectlevel = 4
Below, you’ll see that I have a few triangles, but only one 5-sided polygon. Guess I didn’t close that loop yet- it’s a good thing we checked!
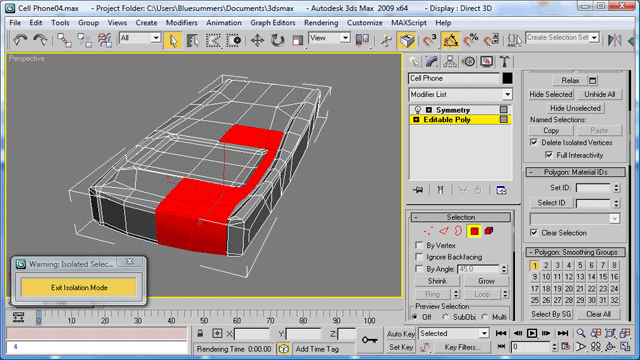
Now that the model’s geometry is compliant, we need to make it quality compliant. I’ve stripped away all smoothing groups in the object and started adding them back one at a time. The different smoothing groups in 3dsMax help create artificial creases similar to what you might see in a mesh-smoothed object. This carries over to the video game engine, so good smoothing groups is one of the many things you’ll need to include in the model.
Below you can see a render of the completed smoothing groups. Doesn’t it look super?
The next step is one of the most arduous in all of 3d graphics; UVW mapping. While the phone’s model is quite simple, the UVWs are pretty complex. We have orthogonal shots of the phone, but because it’s so clean, we’ll have to work with a number of techniques to get it to look right. For starters, I’ve gone into Adobe Photoshop and combined the various parts of the blueprint into a tight texture map. The only tools used here were layers and the clone tool.
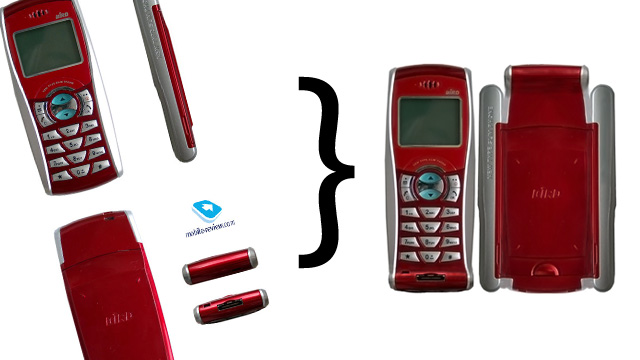
The various parts of the blueprint were stitched together so that I only have to create 2 UVW clusters.
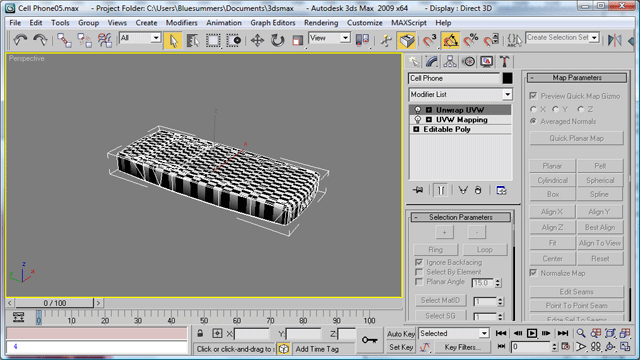
Below, you can see that I’m getting started with setting the UVWs of the phone. I selected the front face (buttons) and the bottom, and used a planar mapping. The manipulation needed here was getting the bottom of the object (where the plug is) properly mapped. On the other hand, the back, sides, and top were remarkably easy. I only laid out half of the phone. Since the phone was created using a symmetry modifier, and the texture was symmetrical as well it was a quick process.
During the next few stages, I worked with both the UVWs and the diffuse map of the phone. The key was to get a blend between changes in the UVW mapping and changes in the diffuse map’s layout.
Whenever possible, try to duplicate UVW coordinates (though it’ll ruin texture baking so be careful). In this case, I detached the geometry, applied a symmetry modifier, and attached and welded the objects back together. Then I just pulled the two symmetrical UVW clusters apart and positioned them so that they were back to normal. No overlapping UVWs, and the job was done in half as long!
After a few hours, I had my phone complete. The UVWs were how I wanted them, and the diffuse map was complete.
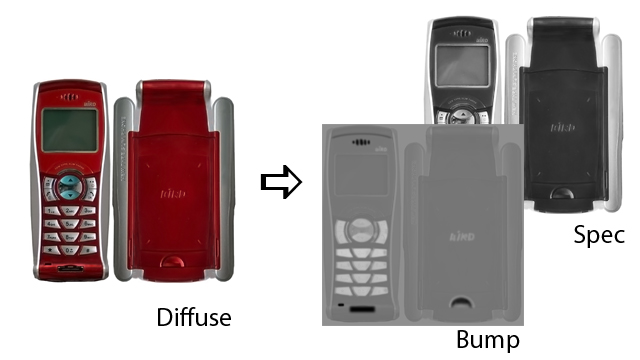
Unfortunately, the material isn’t complete without a bump map and specular map. These two can be quickly generated from Adobe Photoshop. I used several Photoshop filters as part of this process, so I won’t go into the details. Suffice it to say that I made heavy use of the skills I talked about in my Photoshop Skills Monday Movie.
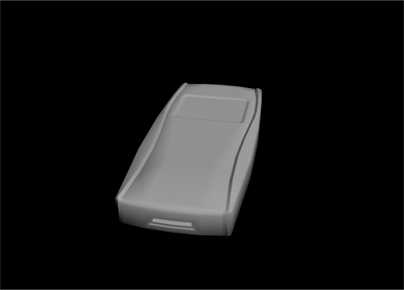
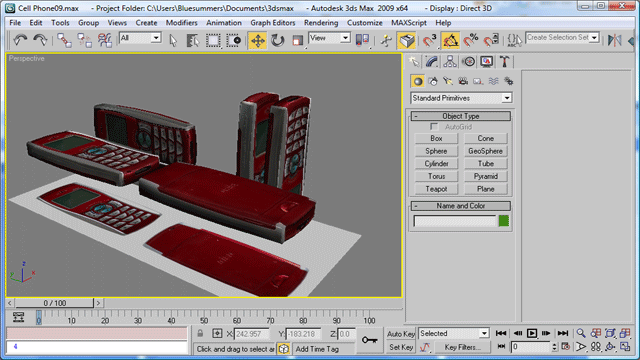
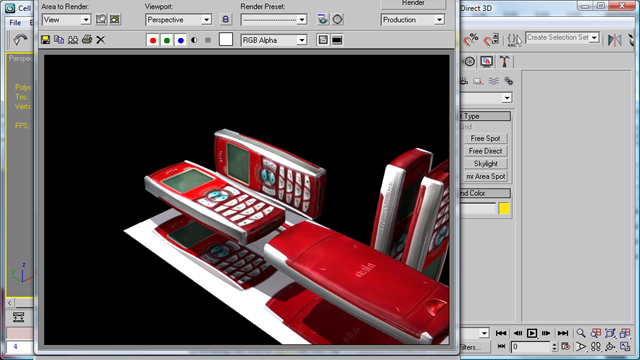
And that’s the rundown. Below you’ll find the completed object after a quick render in 3dsMax. While it’s a little unrealistic to take a render, I’m hoping to include both renders and OpenGL screenshots in order to appeal to multiple audiences. We’ll talk more about that when we’re putting together the Turbosquid product page.
Package the Content
The hardest part is out of the way, but we’re not out of the woods yet. Now we have to export and convert our product into as many formats as possible in order to make it easy for our customers to use it. Delete all of your peripheral objects like blueprints, helper shapes, etc. Sometimes users like to merge .max files together, and the last thing you want is to clutter up their scene with modeling slag. Don’t forget to put the object at the origin, collapse it to an editable mesh, and apply a Reset xForms modifier. If you’re exporting to an object format (like .3ds), make sure you’re exporting only the object. Below is a quick list we’ll be using:
Textures
- .psd – With layers
- .jpg – 256, 512, 1024
- .tga – 256, 512, 1024
Object
- .Max
- .3ds – Referencing the .tgas
- .obj – Referencing the .tgas
- .ase – Referencing the .tgas
Once you’re done with these tasks, put them into a folder structure that makes sense. For example, mine is organized in 3 folders; “Objects”, “Scene”, and “Textures”. Within the “Textures” folder, there are the 3 .psd files, and 3 folders titled “256”, “512”, and “1024”. In this way, anyone looking at the directory structure can quickly figure out where everything is, and how to access it from 3dsMax or from their game engine.
Compress your folder to a .zip to make it easy for someone to download. My product folder is 27 megabytes in size, but only 14 when compressed.
Build the Turbosquid Product
We’re very close to being done. Now it’s just a matter of building up your Turbosquid product. I’m going to give you some specific coaching on what kinds of values you can include in this section, though it’s going to be centered around this particular project.
For starters, we’re going to need some renders and screenshots to show off the product. Here’s a good mix to shoot for:
- A clay render
- 1-3 beauty renders
- A wireframe screenshot or render
- A viewport or OpenGL screenshot
- A texture sheet
- [Optional] Samples or low-res versions of the product to give away for free
Now that you know what you need, let’s talk about how you can get it. First, and foremost, don’t take this step too lightly. In the same way that good rendering can make trivial objects look good, poor rendering can ruin your hours of hard work. Your clay render should be well composed and have a good blend of light and dark. The beauty renders should be carefully and artfully composed and lit. Make your work stand head and shoulders above the rest- that’s what gets product sold. Remember that one of your images will be your thumbnail image- a small 60×60 image that buyers see when they’re browsing for a product. Make it something that grabs your attention, like the render below.
Remember that Turbosquid is going to resize your images down to 400×400 if they’re too big so work in that native resolution to avoid having your precious preview images butchered. Upload all of your images as .jpgs.
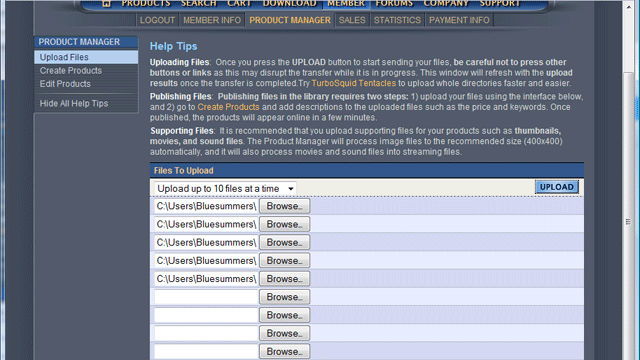
It might take a while to upload your files, so be patient. Once they’re on Turbosquid, you’re ready to start building your product. Click on the “Create Products” link on the left margin, and then click “Add Description” next to the product you want to sell. In our case, it’s a .zip file containing a model and tons of textures.
Fill out the form as you see it appear in your browser. It’s remarkably straightforward, but there are a few things you can do to maximize your revenue:
Don’t forget to change the product’s name. It defaults to the name of the file you uploaded- MyProduct.zip. This is what people see when they’re doing a large thumbnail search, so you’ll need this to be accurate.
Keywords are key words. This is how people find your product, so use as many space separated words as you can. If you run out of words, search for a similar product and use someone else’s keywords. These are exceedingly important, so be sure to blend general terms (like ‘cellular’ and ‘phone’) with specific ones (like ‘S288’ and ‘telecom’). Both my experience and a very reliable source have told me that keywords are of the essence. Never write in generic, barely relevant terms because not only do they muddy up a user’s search but they almost never lead to a sale. Raw exposure is not a valid sales proposition.
To emphasize the point, consider the following blocks of keywords describing a cardboard box that a new television comes in:
Perfect: Cardboard, Box, Shipping, Warehouse, Packaging – Note that these words are descriptive, and branch out into contexts where a buyer might be looking for a cardboard box.
Fair: Cardboard, Box, Shipping, Television, Fedex, Truck – Some of these words are relevant, but others are too far-fetched from what the buyer might be looking for. Cardboard boxes have little to do with Federal Express directly, and a user searching for ‘Truck’ is probably looking for a vehicle.
Bad: Box, Fedex, Brown, Square, Props, Forklift, Sony, Hitachi – These words are barely associated with the product, and deviate too far to be of much use to anyone. Box, brown, and square describe a cardboard box but the terms are too vague to capture the audience you want. The television brands Sony and Hitachi are also too far flung from what the product really is.
Select 2 categories if possible. Cellular phones aren’t a great example of this because there’s a very explicit category for them, and they don’t fit anywhere else (Electronics > Phone > Cellular). Something more ambiguous (like a large chemical mixer) might fit into both Industrial > Machine and Science > Lab Equipment. However, don’t push your luck- an object slotted in a category it doesn’t belong is sure to get you into trouble- so use some common sense.
Write a catchy short description, and a terse paragraph description. This is a little harder to describe, so I’ll show some examples. This product is an example of not writing enough- there’s no short description, and the long description doesn’t have much in it. On the other hand, this similar product is presented in a very clear manner. The bullets at the bottom sum up the product handily, though I might say that there are a few too many bullets. Either way, if you expect to sell the product, you must describe it.
Let your images do most of the talking. The cliche “a picture is worth a thousand words” exists for a reason. Because they are. Buyers want to see the product in action! Show them your modeling prowess; show them your clean, neat textures; strut your fantastic rigging! If you can put it into a colorful, descriptive image- do it. Polygon counts, texture sheets, anything. For example, in my final product I provided 5 different color diffuse maps- and they make an appearance in one of the renders. Similarly, if you’re providing something that adds a lot of value, try to get a render of it rather than just talking about it.
Always fill in the technical details, and (if you qualify) apply for ‘Game Ready Submission’ review. Let your users know how much strain your product is going to put on their machine by filling out this information. Even though you’re not required, most buyers look for this information. If your product is Game Ready (like mine), then apply for certification. It sets you apart from the competition, and helps buyers make an informed decision. The ‘Game Ready Submission’ was a critical part of this project. Without it, the phone would yield much less since it would be drowning amidst similar products.
If you have similar products, show them off. Toward the very bottom of the product screen there’s a section where you can recommend other products that you’ve created. Fill this in 99% of the time. If you’ve modeled a cell phone, put a link to other electronics you’ve modeled. If you posted a tree, list other architectural props you’ve made like fountains or shrubs. This is free advertising- use it!
Lather, Rince, Repeat
It looks like we’re done! We’ve built out an entire cellular telephone, packaged it up for Turbosquid, and posted it for sale. What happens now is up to you.
Once you start creating several products, you can link them together in interesting (and profitable ways). For one thing, we covered using the “Suggested Products” feature. Many users will create objects as part of a set, and then sell them in bundles. For example, this user made a Cardio Cycle available on it’s own for buyers who might be looking for just one piece of equipment. However, suppose an arch-viz firm is looking to render an entire gymnasium. In that case, this user bundled several pieces of Cardio Equipment together into a pack. Bundling very often leads to higher revenues because it encourages customers to buy whole blocks of content.
Your income is as serious as you are. Now I did say that you won’t get rich using Turbosquid, but only because 95% of people out there don’t have the stomach to do what it takes. You need to create a lot of high-quality content in order to start stacking mad paper. Luckily, selling content is only as serious as you make it.
Stick with it. It can take a while for a product to yield it’s full payoff. I’ve got products I uploaded 4 years ago that are still being bought every few weeks. Over time, it’s not uncommon to earn hundreds or thousands of dollars from a single upload. Over the weeks and months, you’ll start earning money. If it gets serious, you can begin to rely on it as a real source of income.
That’s the rundown. I hope you’ve found this tutorial insightful, and, with any luck, you’ll start making a little cash on the side by selling your 3d work through partners like Turbosquid. Be sure to stay tuned every week for my Monday Movies, where I give you more quick tips on using 3d Studio Max.
Cheers,
–Mr. Bluesummers
MrBluesummers@MrBluesummers.com



By nicecrispybacon April 13, 2010 - 12:05 pm
Very good article, really enjoyed it’s structure and clarity..
Maybe I should start uploading some of the stuff that now just sitting on my drives.
By Johnny May 31, 2010 - 9:34 pm
Outstanding article, I really liked the straight forward info.
I see way to many articles like this that read like a infomercial.
Now I am more motivated to continue to learn to model.
By John December 25, 2010 - 4:37 am
Very nice. Now I can do something with all these model’s I can’t use anymore. Heck maybe even get money to buy a full version of 3ds MAX.
Also it’s “Rinse Lather Repeat”
By Mr. Bluesummers January 3, 2011 - 6:38 pm
Hey John! Glad you found it useful.
I went and got a bottle of shampoo to confirm one way or the other, but it doesn’t say. I always thought it was something like
Massage into scalp and hair
Lather
Repeat
Might have to consult the internet on this one…
By Mahmoud Khairy August 20, 2011 - 5:44 am
السلام عليكم نرجو منحضراتكم مساعدتى فى تعلم برنامج 3dsmax لأنه سيأتينى عمل فى هذ المجال بعد غد الاثنين والسلام
By Mahmoud Khairy August 20, 2011 - 5:47 am
Good morning I have to work as 3dsmax graphic programmer next monday , could you help me ? thank you very much
By Mahmoud Khairy August 21, 2011 - 2:20 pm
السلام عليكم أريد منحضراتكم أن تساعدونى باسرع وقت لكى أكون كفءا للعمل كمصمم 3دى ماكس فى اختبار الغد ظهرا بالجامعة شكرا جدا
By Olasope Olumide April 7, 2013 - 2:17 pm
really love this article, going to start populating my turbosquid account very soon, thanks for these tips, they are extremely helpful. looking at ur turbosquid page, really nice models. Thanks again
By Olasope Olumide April 7, 2013 - 2:27 pm
was looking at d wrong turbosquid page…..why did u stop uploading to turbosquid? do U only do official jobs now?