Updated 01/06/2010
YouTube.com is the largest video portal in the world, bar none. Over 10 hours of video are uploaded to YouTube every minute, and if you want your videos to survive in that kind of environment you’ll need to upload in the highest quality possible. In this post, I’ll show you how I get the highest quality uploads for my Monday Movie series using free software. Once you know what the best YouTube upload format is, you’ll be good to go!
Read the Manual
I know this sounds silly, but the best thing you can do is read the YouTube Handbook. It goes over lots of helpful techniques on everything from the best upload formats to executing a perfect timelapse shot.
Below you’ll find a copy of their upload specifications as of 9/12/2008
YouTube can accept almost any video format for upload, but for most users we have found the following settings give the best results.
- Video Format: H.264, MPEG-2 or MPEG-4 preferred
- Aspect Ratio: Native aspect ratio without letterboxing (examples: 4:3, 16:9)
- Resolution: 640×360 (16:9) or 480×360 (4:3) recommended
- Audio Format: MP3 or AAC preferred
- Frames per second: 30
- Maximum length: 10 minutes (we recommend 2-3 minutes)
- Maximum file size: 1 GB
You’ll notice that it’s pretty cut and dried, but they don’t give you much indication of how to go about reaching these requirements.
Getting the best YouTube upload quality basically stacks up into two big categories; resizing and encoding. Briefly, you’ll want to upload at either of the recommended resolutions, and then alter your encoding quality.
Resizing
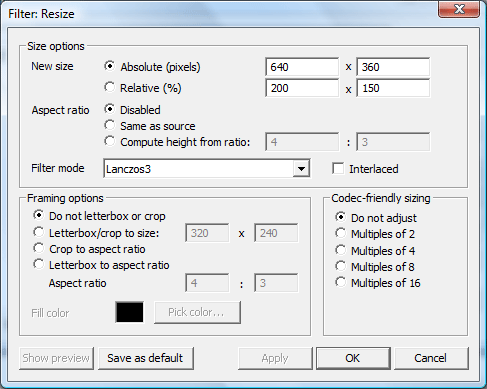
Once I’m done editing my footage, I use VirtualDub (a free software) to encode and resize my footage. The resizing operation is a filter that you can apply (CTRL+F). My videos start off much larger than the final 640×360.
Edit: I’ve since switched to HD formats as YouTube is now doing full-size encoding. My uploads are now 1280×720 and YouTube handles the resizing from there.
Notice in this screenshot that I’m using the Lanczos resize filter. This is an extremely important point- that’s why it’s in bold and has this accompanying statement. Using the ordinary bicubic filter will massively shortchange the high-frequency detail in your footage. By using this resizing filter, you’re keeping the tinest details and packing it into that 640×360 frame.
I also resize down to 640×360- the recommended widescreen size in the YouTube upload format specification. I’ve had incredible success with it because YouTube doesn’t do any resizing when the resolution is correct coming in. For nobodys like me, this is good because it keeps the control in my hands.
Edit: This has come a long way since Jan 2009. Youtube’s resizing has been good for me.
Encoding
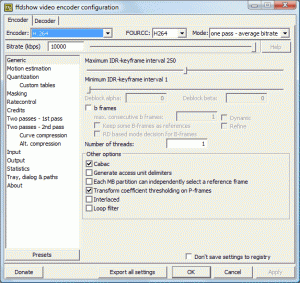
I use H.264 for uploading to YouTube. I’ve found a free encoding library called FFDShow that lets you get into this format from Premier, Virtual Dub, or any other software that can access your installed codecs.
You can find the compression dialogue under Ctrl+P in VirtualDub, and you’ll find that the settings for H264 are very robust. I don’t mess with the defaults much, but since my videos are so short and don’t have much movement, I hike up the quality as high as it’ll go. I’m pretty sure people more savvy than I could make fuller use of this codec- I just wanted to show you the basics.
Done!
That’s it! Just upload the file and within a few minutes YouTube will have it encoded and ready for you to work with. You’ll find that it’s really a lot simpler than you think, and your videos can get a massive quality boost when uploaded.


By Mackeran September 15, 2009 - 1:49 pm
??… ????? ????? ?? ??????? ????????, ? ? ??? ?? ???? ?? ????????????.