In this quick article, we’ll be visually exploring how to adjust the quality of the depth of field effect in 3d Studio Max with mental ray. The process is closely tied with how you increase the quality of your render (sampling). All you have to do is increase your render sampling to smoothen the depth of field effect. Once you’ve had some practice, you’ll know just how to adjust your render to get great results every time.
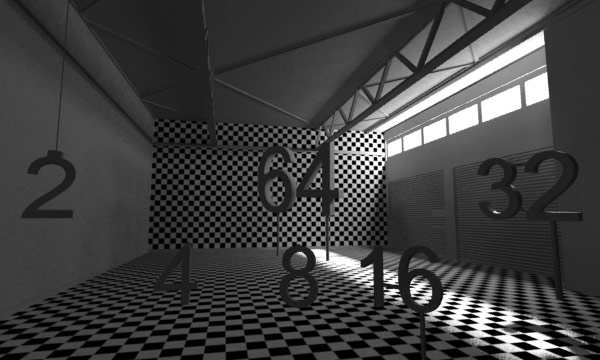
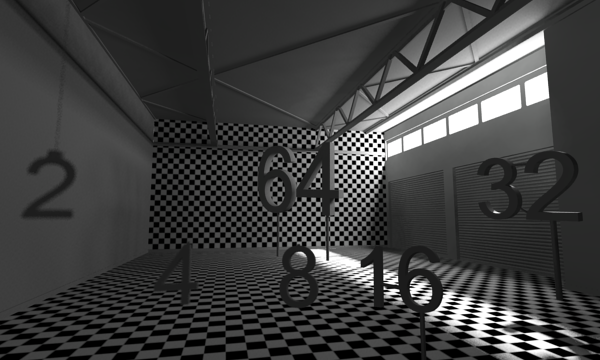
Let’s begin with my warehouse sample scene. There are several aspects of the scene that make it perfect for testing depth of field.
- There are numbers around the scene that represent a distance from the camera in feet. “2” is 2 feet from the camera, “4” is 4 feet from the camera, etc.
- There are lots of detail around like girders and windows that will accentuate any blurring effects.
- The floor and wall have a checker pattern that is 1-foot by 1-foot squares. They also help us understand the blurring effect.
We can do better than this, but let’s set up our depth of field effect first. Once we get an effect we like, we can improve the quality.
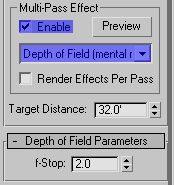
Select the camera, and engage the depth of field (mental ray) effect.
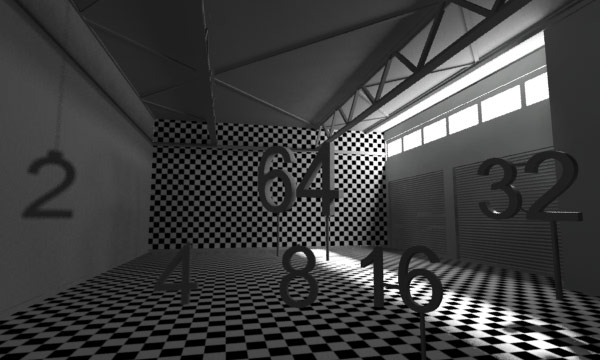
When we take another render, we can see that some elements have gotten blurry. With a target distance of 32 feet, we can see the number “32” clearly, but the number “2” is blurrier.
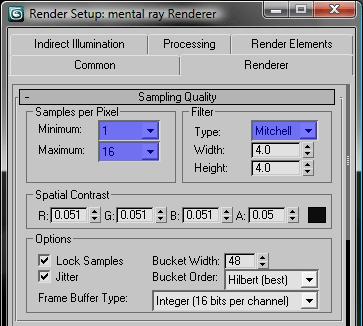
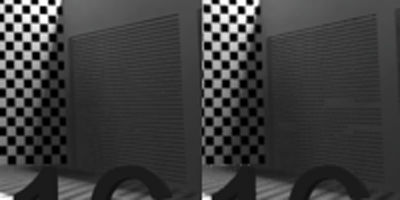
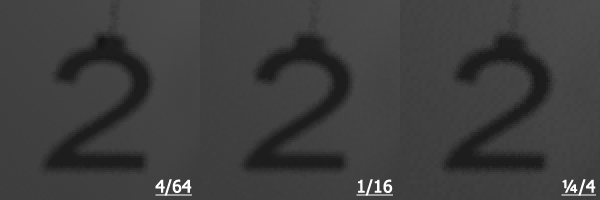
Notice that the image is still pretty grainy, and we’re even getting sampling artifacts on the tile flooring and garage doors. Let’s improve our render sampling and get a comparison to see how we can improve the quality. The most direct way to improve the quality is to increase our sampling from {1/4 and 4} to 1 and 16. We’ll also want to use a better filter type.
Below you can see the new render plus a comparison of key areas before and after the Samples per Pixel change.
Now there’s a catch to all of this. The original render only took 2:41 while the finer render took 6:53. Remember not to turn up your depth of field quality settings until you’re ready to take a final render!
By Jacky Liang January 12, 2011 - 6:04 am
Hi Mr. Bluesummers! Glad you’re back 😀 Nice tutorial btw 🙂
By Frankdefaria February 2, 2011 - 11:25 pm
Very nice tutorial.
By Reo September 7, 2011 - 12:20 pm
Hi Mr. Bluesummers! thanks for the tutorial and its too helpful. please gives us more detailing about Sampling Quality. thank you.
By Custom Garage Doors September 28, 2011 - 2:47 am
Custom Garage Doors…
[…]Depth of Field Quality Adjustment in 3ds Max’s mental ray | MrBluesummers.com[…]…