Welcome to another World-Machine 2 tutorial! There’s a lot to be excited about in this nifty program, and one of them is the new color maps feature. If you don’t have a copy of World-Machine, you can always download the trial version. You can now use the awesome selection tools in World Machine to mix and match color swatches (and even image maps) in order to create your own color overlays for terrains. We’ll be going over all the selection types in the context of mixing colors. Of course, you’re not limited in how you use these; feel free to use them to create new heightfields, mix heightfields together, and whatever else you can imagine.
World Machine Finished File Download
So let’s get started. I’m going to be using the basic World-Machine 2 default file, and I assume you’ve played around with the program for a few sessions. The only change I made to the original scene was to make it a little larger. You can see my world extents window by clicking here. I’ve created a new group to help keep things organized for you. You don’t have to do that if you don’t want.
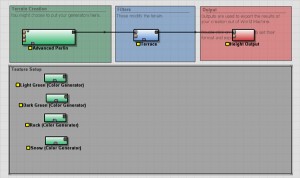
To get started, create a few colors. You can find the “Color Generator” device under the “Generator” tab or the “Bitmap” tab- depending on how you have things organized. You can alternate between organization structures from the “Tools” tab, using the first two buttons. The Color Generator looks like a rainbow blob in a green button. Hover over buttons to see their names.
Let’s go ahead and insert some colors into the scene by selecting the “Color Generator” and clicking a few times in your node graph. Double click on the node and assign each node a color. I made two shades of green, a rock color, and an off-white snow color.
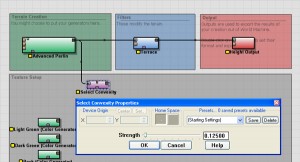
I’d like to mix up the two green colors in a creative way! How about using the new “Convexity” selection device? Ordinarily, we’d have to use ambient occlusion maps outside of World-Machine in order to generate a map like this. But nothing compares to pre-calculation, so let’s bake it into the map. You can find all the selection devices under the “Selector” tab. This tab is only visible under the “Filter by Device Type” organization, so if you don’t see it, re-read the earlier note about filtering.
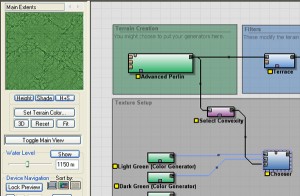
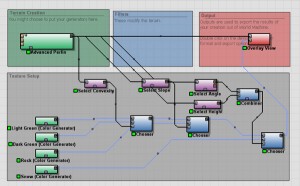
Note that the “Advanced Perlin” device is outputting to multiple devices. I did this by clicking from “Select Convexity” to “Advanced Perlin”- not the other way around. This allows you to hook several subsequent inputs into a single output. Neat trick, huh?
Once your convexity properties are set, you can connect it into the 3rd input of a “Chooser” node. This is the first button under the “Combiner” tab and it combines two devices based on a heightfield (rather than combining them procedurally). Create this node in your graph, and connect your two colors to the first and second inputs of the “Chooser”. Connect your convexity selector to the third input, and enjoy your results.
Now that we’ve set up the first combiner, I won’t bother with the repeated details. Let’s explore the other selection devices and see how else we can blend our material. Creative blending here will save you time and effort later on in 3dsMax, Terragen, or Vue d’Esprit. You won’t need to generate procedural blending maps or masks because you’ll be able to render precomputed maps from World-Machine.
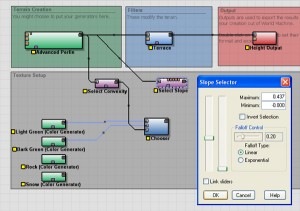
Select the “Select Slope” selector from the list, and connect it to the terrain generator as you did for the last selector. Double-click on the selector. In the following window, you’ll see two sliders that control the start and end of the slope selection. Lower values mean shallower slopes, and higher values mean steeper slopes. I’ve selected a moderate range of shallow slopes with a low falloff. I want a little mixing between grass and rock, but not much. This gentle blending has a great effect when rendered.
Similar to the previous process, create a new “Chooser” node, and connect your rock color and the previous chooser as inputs. You’ll then connect your new “Slope Selector” as the final input node (the mixer).
So far we’ve mixed two kinds of grass and a single rock color. For the snow, let’s spice things up. I want snow on the North-facing peaks above a certain elevation. Sounds like a tall order, doesn’t it? It’s not! World-Machine allows you to combine mask maps in much the same way that it allows us to mix color maps. We just have to combine a “Select Angle” device and a “Select Height” device such that we get a mask that fits our demands. Try getting angular snow deposits in 3dsMax- fat chance.
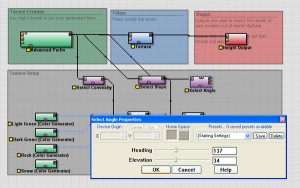
We’ll start by creating the “Select Angle” device and attaching it to the “Advanced Perlin” heightfield generator. I’ve included a screenshot of my settings below.
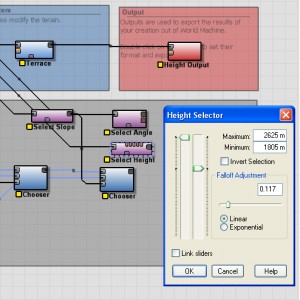
We’ll also want the “Select Height” device, which allows us to set a minimum on how far down snow should go on the heightfield. Just like the other filters, this needs to be connected to the heightfield generator as well. Notice a similar interface to the “Select Slope” window. We select a range using the two sliders- higher values indicate a higher elevation, while lower values indicate a lower elevation.
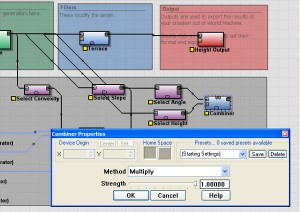
Finally, you’ll create a simple “Combiner” device. Notice the difference between a combiner and a “Chooser”. The combiner does not mix according to a map, but instead according to a formula. Also, the combiner can be biased one way or another- an important quality that we’ll use. Create your combiner and hook both selectors into it. Double click on the combiner and set it to “Multiply” with full bias toward the height selector.
Only one small detail remains, although the next step should be pretty clear. You’ll want to use this combined map as the choose-y map for another “Chooser” device. This final “Chooser” will select between the snow and the grass/rock result we got from the last “Chooser” node.
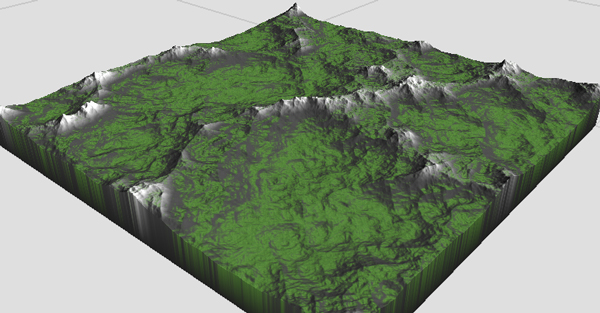
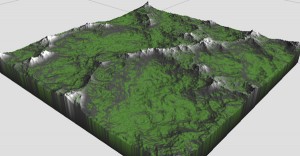
But how to overlay this awesome color map on our terrain? For that you’ll want the “Overlay View” node, found in the “Output” tab. The image is of a terrain with a colorful topography. When you connect the resultant color map to the “Overlay Input” on the Overlay View (bottom input) and the original heightfield into the “Primary Input” on the Overlay View (top input), you’ll see the terrain displayed in the preview viewport using your awesome new color map!
When all is said and done, here’s what my node graph looks like. Notice I bypassed the terrace node to keep the color map and the heightfield consistent.
And that’s all there is to it! I know it seems like a mess, but it’s actually pretty basic considering what we managed to pull off. You can combine these in a wide variety of ways, including combining them into macros and merging many together to simplify the node graph. Very complex materials are possible.
Consider experimenting with this technique to colorize sediment from the erosion device, or create sandy beaches with the “Coastal Erosion” device. what makes this special and a world apart from doing it in 3dsMax or Maya is that you have a lot of information that you wouldn’t otherwise have. Deposition maps, flow maps, wear maps and more would otherwise have been lost.


By World-Machine Colors and Mixing Tutorial | MrBluesummers.com January 10, 2009 - 12:30 am
[…] Click here to read the tutorial! Tags: Materials, Tutorial, World Machine Category: Blog You can follow any responses to this entry through the RSS 2.0 feed. You can leave a response, or trackback from your own site. Leave a Reply » Log in […]
By Dave Stewart March 31, 2013 - 1:13 am
Hi,
Great tutorial, however I have a problem. How do I go about specifically doing a color map? The reason I ask is I have bought this https://www.assetstore.unity3d.com/#/content/4722
and as you will see it needs a WM generated color map. I am limited to the default terrain as I can pretty much whip up a terrain in WM but am stuck when it comes to making a color map. Hope you can point me in the right direction.
Regards,
Dave Stewart [UK]