I realize that there are about a million clay render tutorials out there, and thousands for 3d Studio Max. Unfortunately, many people are still hung up on how to do them as evidenced by the questions we get in the 3dTotal forums. To resolve this, I’ve decided to write my own that I can reference whenever the question comes up.
In the same spirit as my toaster tutorial (which will eventually get copied to this blog), I’d like to clearly outline every step in the process so as to leave no questions.
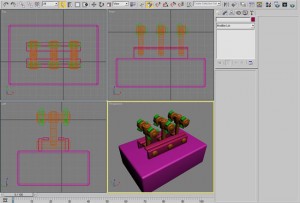
To begin, you see your typical 3dsMax ui. You’ve probably created an object that’s super cool, and you want to show it on a website or in class for critique. But how to make it smooth and crisp so that your modeling can be critiqued? Let’s go through the 3 easy steps to creating a clay render.
Step 1: Assign all the objects a single, white material.
So the first step in this process is the hardest. We need to assign an all white material to the objects in the scene.
We’ll start by using the select all command (Hotkey Ctrl + A), so that we have all our objects highlighted. This way instead of applying materials one-by-one, we can do it all at once.
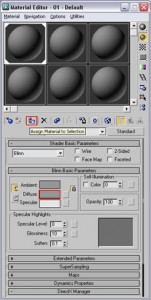
Next, we’ll need to open the material browser (Hotkey ‘M’).
After that, we’ll need to apply the material to everything in the scene. “But wait, why would we do that before we change the color?” Because this is a great opportunity to illustrate material instantiation! When you apply the material to the object, you can keep working on it in the material browser and the changes will replicate to the copies of the material that have been applied to the objects. Nifty, huh?
Our change will be to alter the color of the “Diffuse” swatch. You’ll want to click on the color block next to the word “Diffuse”, as shown highlighted in red in the image above.
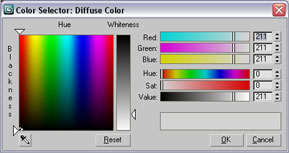
After that, you’ll see the color-picker dialog like below. For my example, I’ve chosen a light grey; about 220.
Step 2: Create a skylight to remove the default lighting.
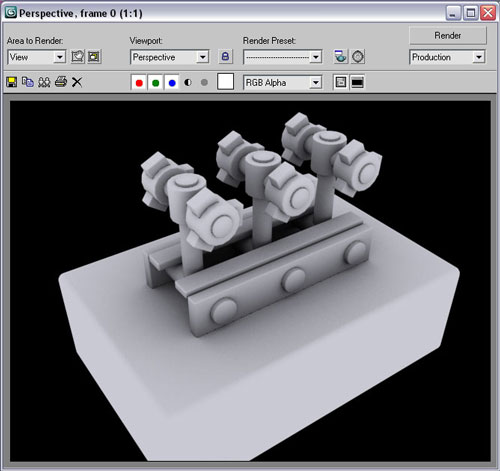
Super! All the objects are now a single color; white-gray. This is half of the process to a clay render. If you render now, you’ll see that the colors look a little less sickening, but it’s still not crisp. Remember, your render hotkey is Shift+Q!
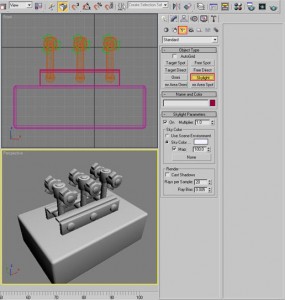
At this point, go back to your create panel on the right-hand side, and click on lights.
From there, select “Standard” from the pulldown. In 3d studio max 2009, this is defaulted to “Photometric”, and the “Skylight” we want isn’t in that group.
Allow me for a moment to talk about the skylight. If you are in a hurry, go on to the next paragraph. Skylights are lights that are like inverse-omni-directional lights. They don’t emmit light from a single point, but instead cast light from all over. Any part of your scene that has exposure to the “background” will get some exposure to light cast from the skylight. You can experiment with this later by creating a skylight and trying to illuminate an object that is under another object, or entirely enclosed in one.
When you create your skylight, it doesn’t matter where you put it. It’s more of a concept than a literal object, so the skylight object is kind of just a manifestation of the idea.
Step 3: Force the skylight to cast shadows and render.
You’re so close to the clay render you want, you wouldn’t believe it if I told you!
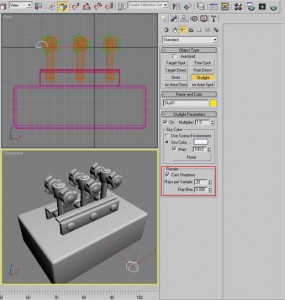
Now all you have to do is click on “Cast Shadows” under the render group in the skylight in order to have it make those luscious soft shadows underneath objects.
Note: If it looks like the “Cast Shadows” group is greyed out, it’s because you’re using the mental ray renderer, or some other 3rd party renderer. You can fix this by hitting F10, going to the bottom of the “Common” tab, and setting your renderer back to the default “Scanline”.
Notice where it says “Samples”? This determines how soft or grainy the shadows are under your objects. The higher this number, the softer and more smooth the shadows will be, and the longer it takes to render. On the flip-side, if you turn this number down to 8 or 5, the render process will go faster but the shadows will be grainy and rough. Feel free to experiment with this and get a feel for the difference.
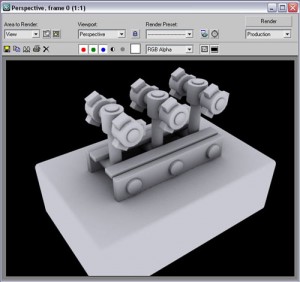
Finally, go ahead and render your image (Hotkey Shift + Q)
And you’ve done it! You’ve created an easy clay render! It’s really a pretty breezy operation once you’ve done it a few times. In the future, I plan to make some tutorials about making clay renders with mental ray, the sunlight object, and with ambient occlusion (though probably not all at once).
Until next time, happy rendering!
By MrBluesummers.com » Blog Archive » Clay rendering made simple December 4, 2008 - 6:13 pm
[…] Click here to read more! Tags: Help, Old Blog, Tutorial Category: Tutorial You can follow any responses to this entry through the RSS 2.0 feed. You can leave a response, or trackback from your own site. Leave a Reply » Log in […]